In this tutorial, we’ll Create A Stunning Navigation Bar In Figma Step-By-Step Tutorial.
Creating an interactive app navigation menu in Figma can be a great way to prototype your app’s user interface and interactions. Here’s a step-by-step tutorial to guide you through the process:
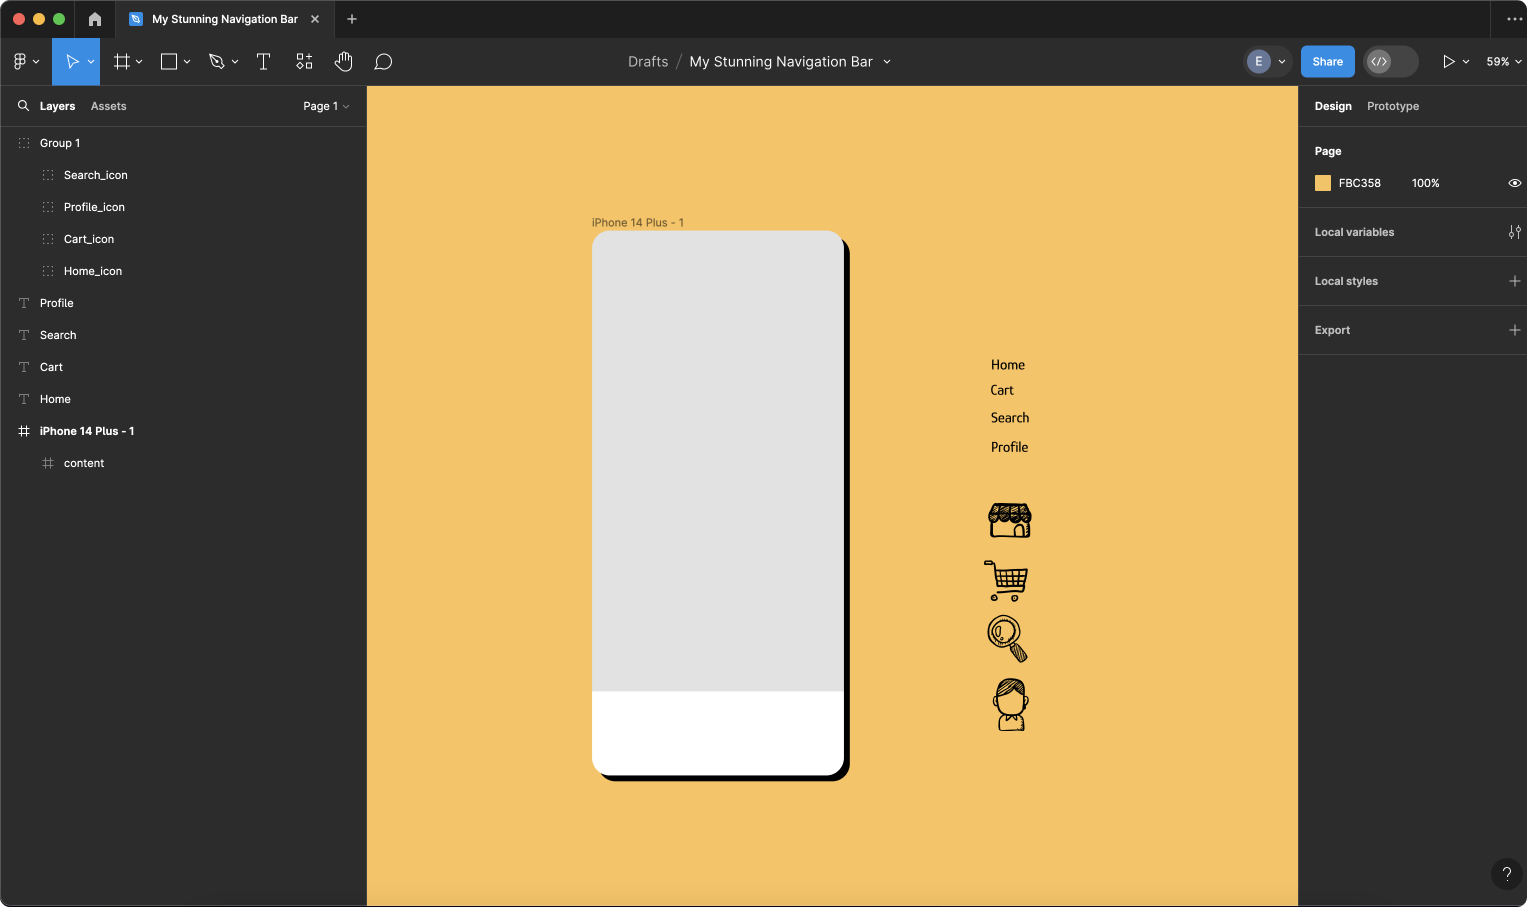
The menu will contain 4 links: Home, Cart, Search and Profile
Step 1: Setting Up Your Figma File
Begin by opening Figma and creating a new file or opening an existing one where you intend to design the interactive navigation menu. Add a mobile frame by pressing F and then choosing the iPhone 14 Plus frame.
Next, list the menu items (Home, Cart, Search, and Profile) and add the corresponding icons.


Step 2: Creating the icon component
Now, press F to add a 48×48 frame and name it ‘Icon’. Next, convert it into a component by pressing Alt + Command + K (Windows: Alt + Ctrl + K).
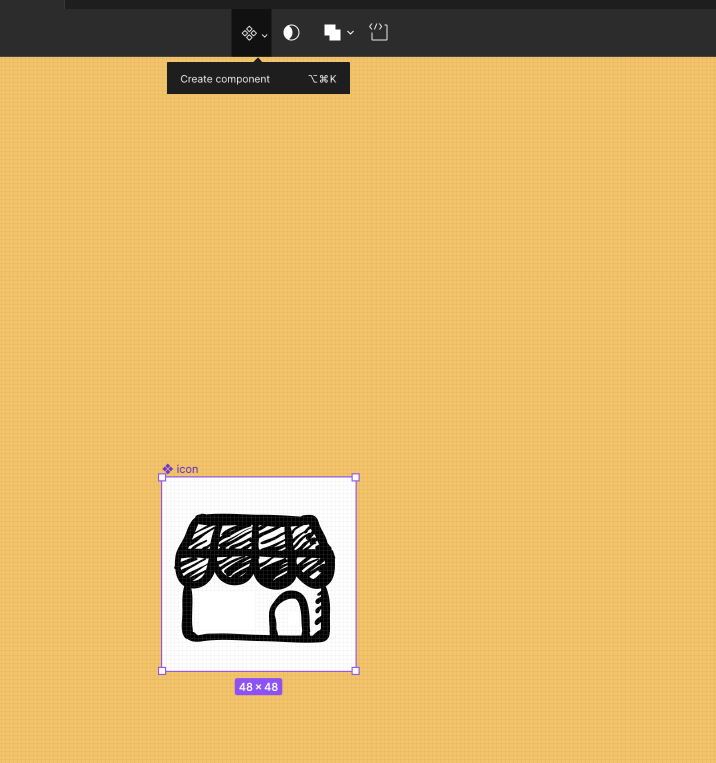
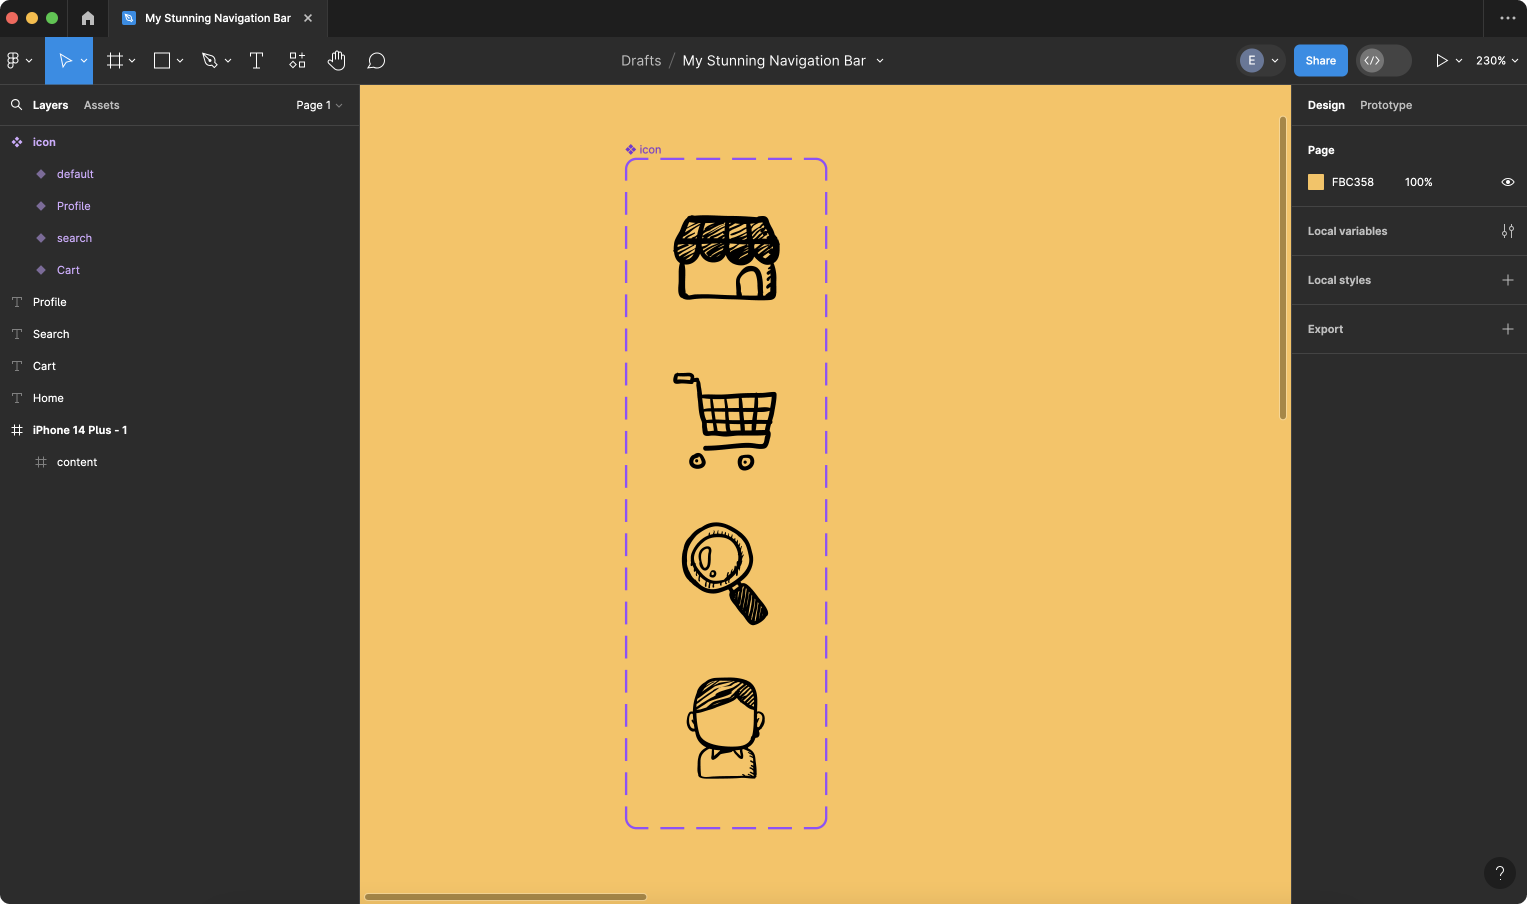
The icon will have three variants corresponding to our items (Home, Cart, Search, and Profile).
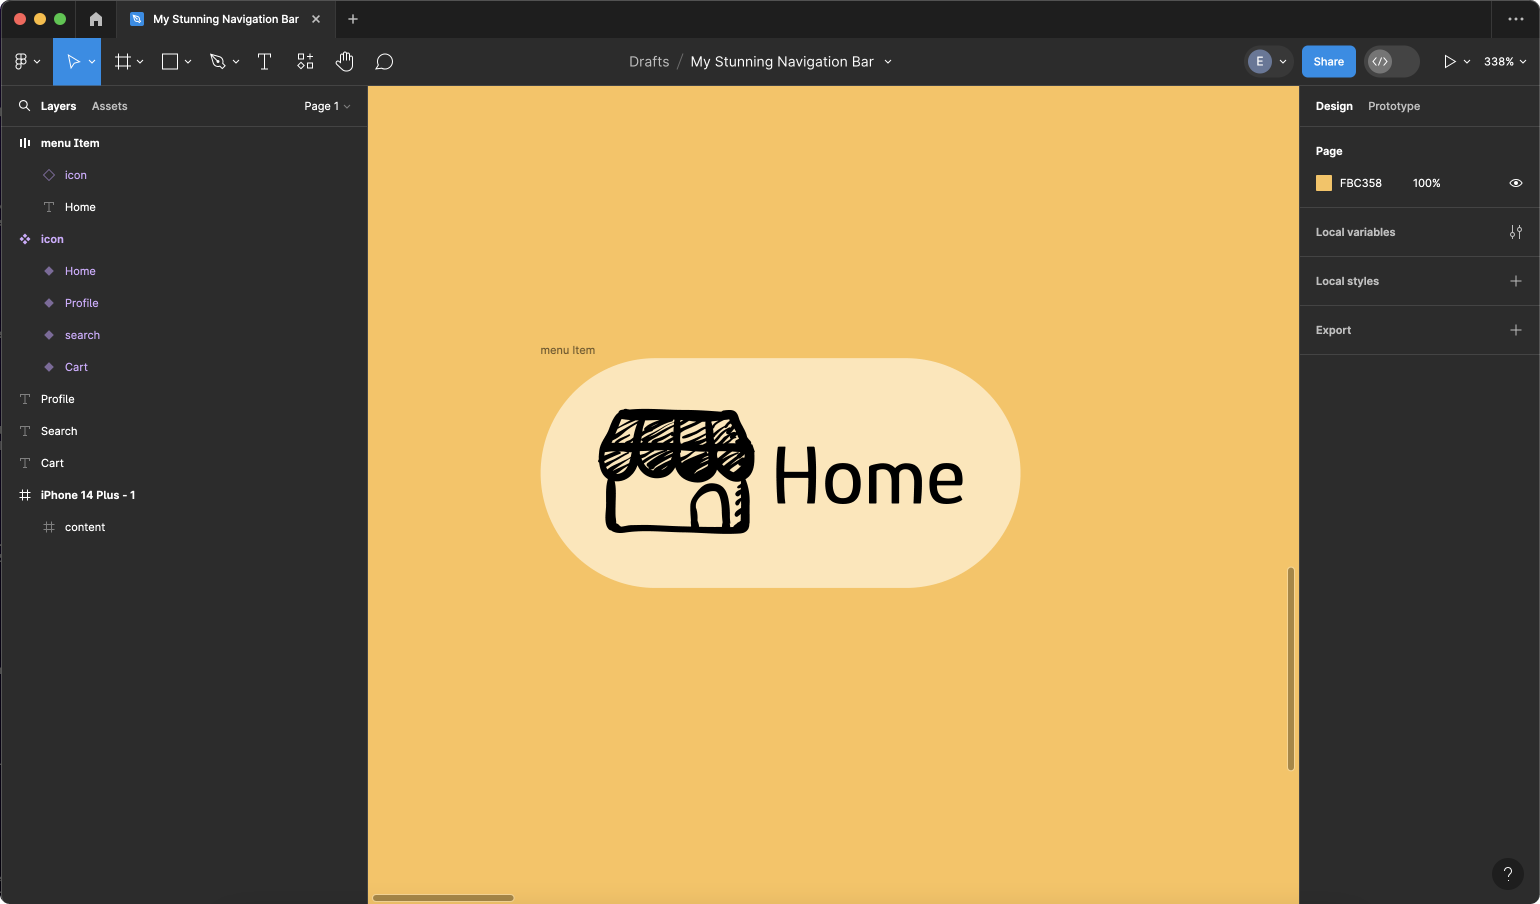
Step 3: Creating the menu item
Navigate to Assets and drag ‘Icon’. Position ‘Home’ next to ‘Icon’ and convert them into a component named ‘Menu Item’. Ensure it has 10px of horizontal and vertical padding.
Apply a fill color of #FFE5B5 and a border radius of 30px.
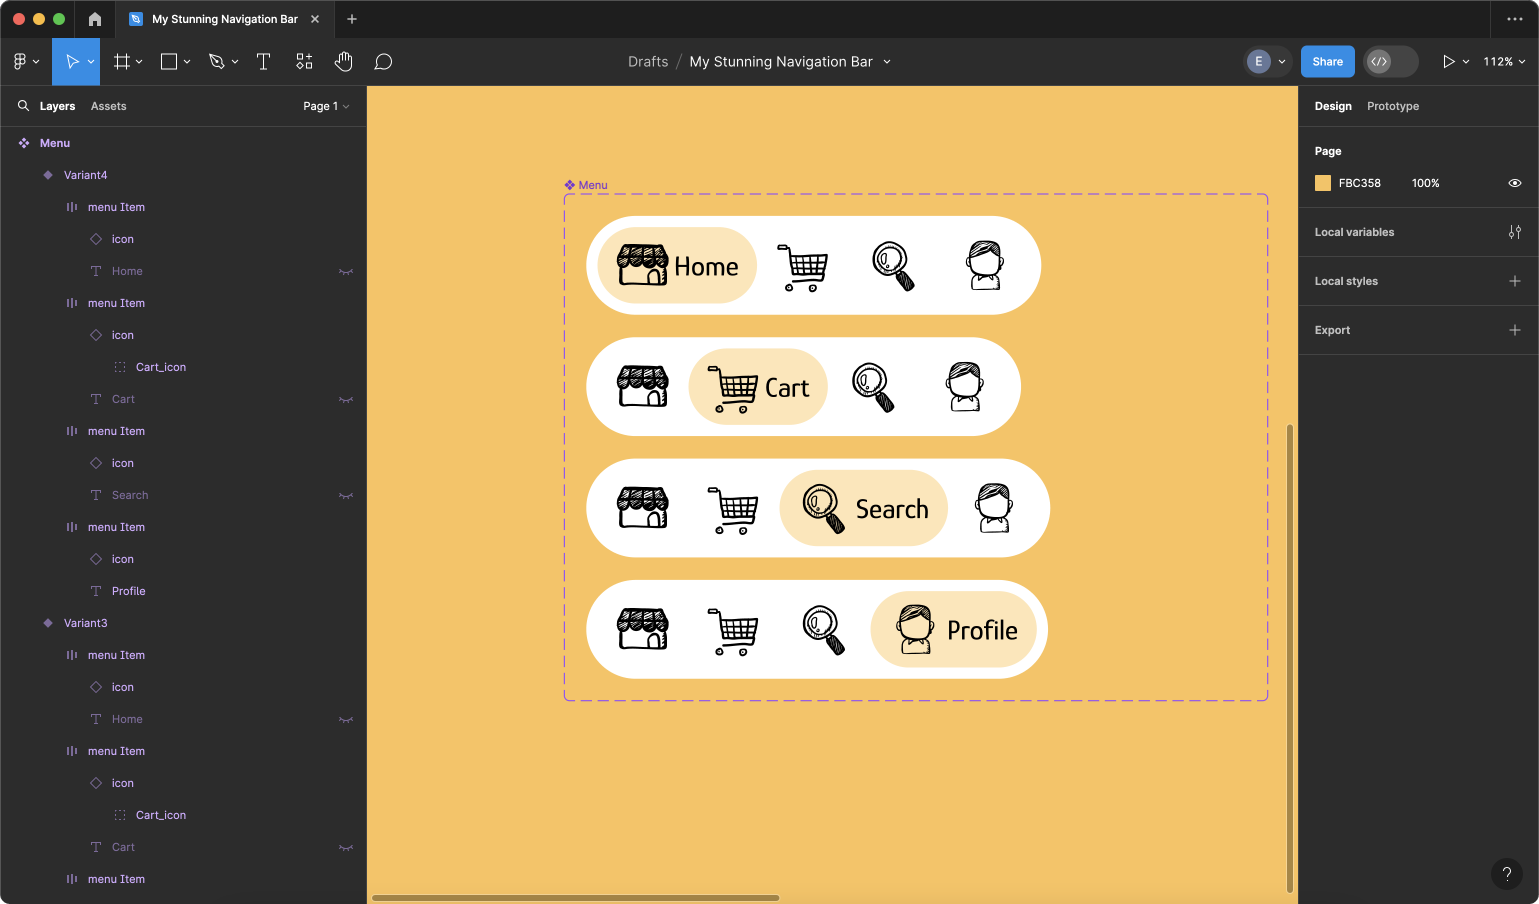
Step 4: Creating the menu
Duplicate the menu item three times. Press Shift+A to create an auto layout, and rename them accordingly (Home, Cart, Search, and Profile). Change the icons from the variants menu to the corresponding icons. Then select them all, press Shift+A to add a new auto layout, and name it ‘menu’.
This will result in a layout resembling the following:

Ensure it has 10px of horizontal and vertical padding. Apply a fill color of #FFFFFF and a border radius of 60.

Step 5: Define the menu states
Now, let’s add variants to the menu for each active state.
For each variant, we will hide the text of the inactive icons along with the background.
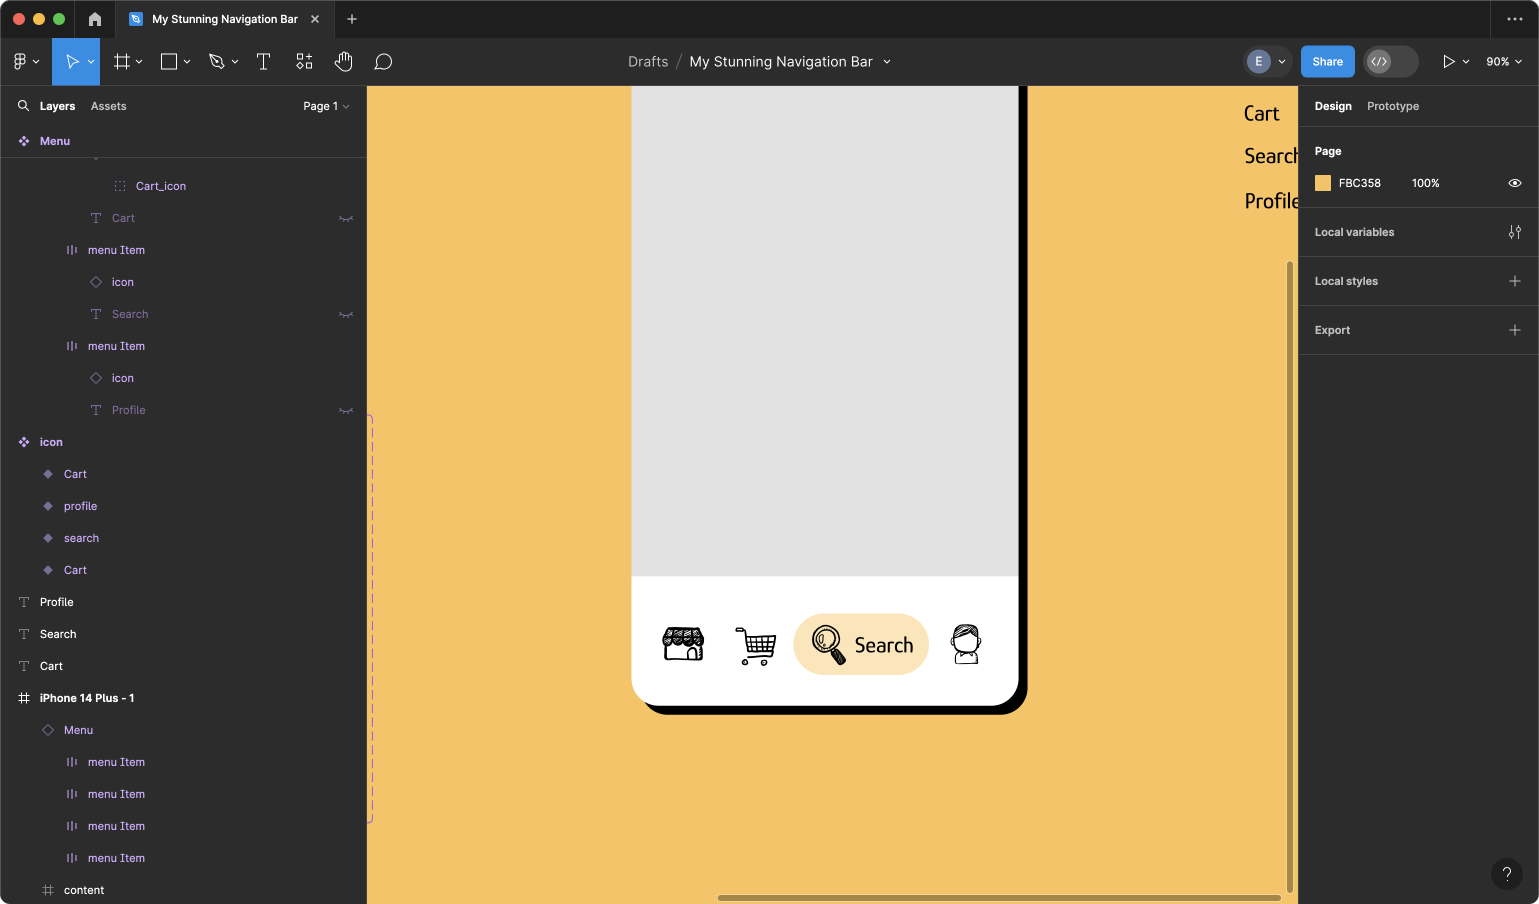
Step 6: Verifying Menu Fit
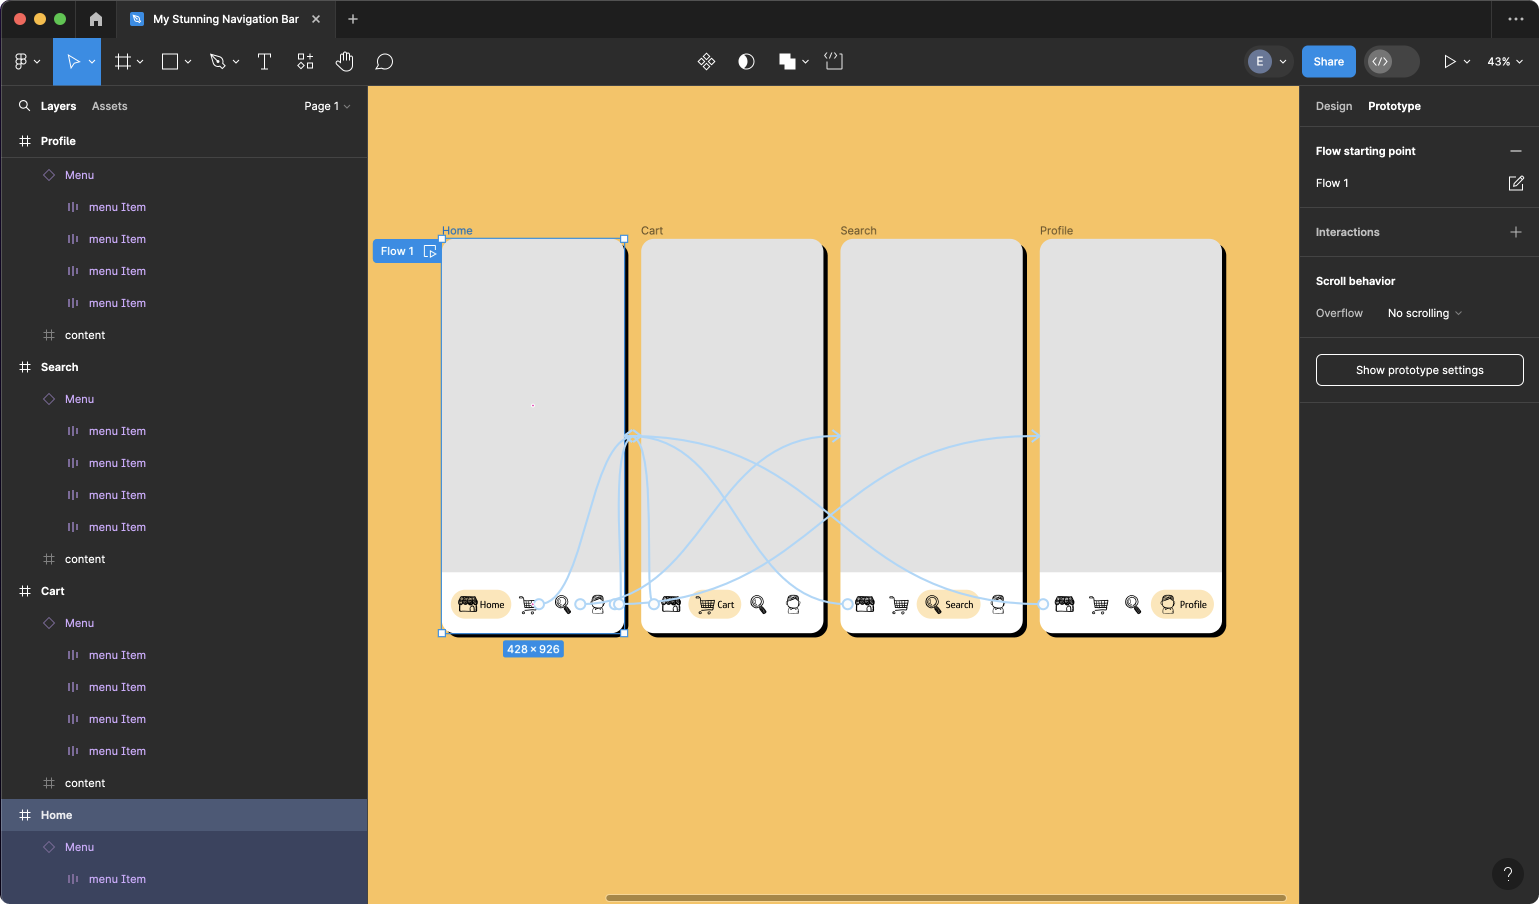
It’s now crucial to ensure that our menu fits within the mobile frame. Duplicate the mobile frame three times. Next, drag the menu, along with all its different sizes and states, onto each iPhone frame. If everything fits seamlessly, you’re ready to proceed with linking them together!
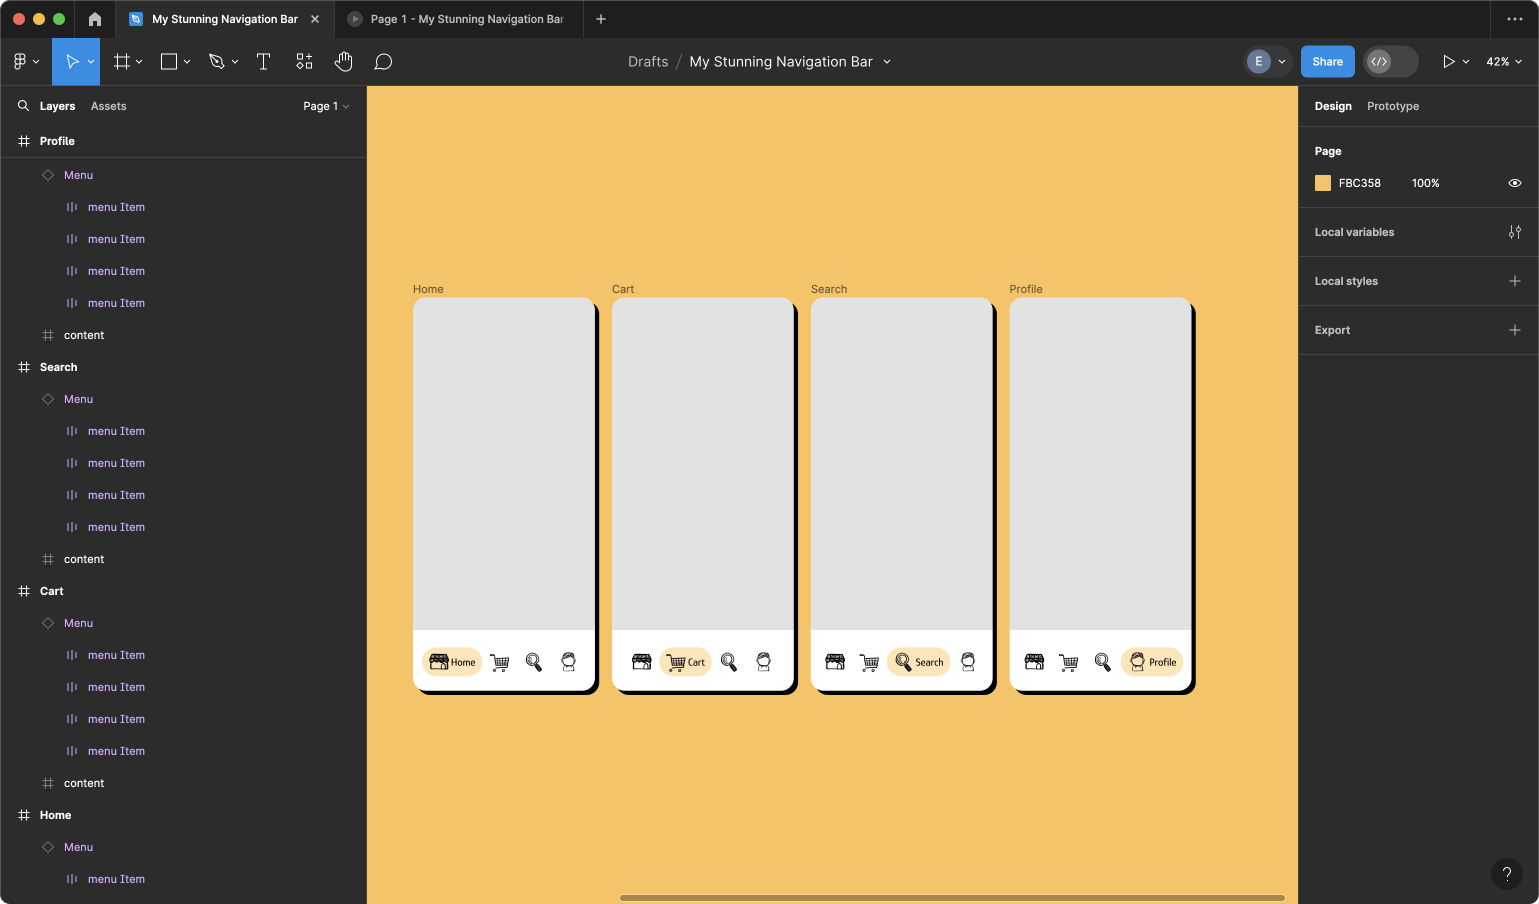
Step 7: Transitioning to Prototyping
Now it’s time to proceed to Prototype. In the initial mobile frame, select the menu (Home) and drag the link to the second mobile frame (Cart). Choose “On Tap,” “Smart Animate,” and ease out 300ms.
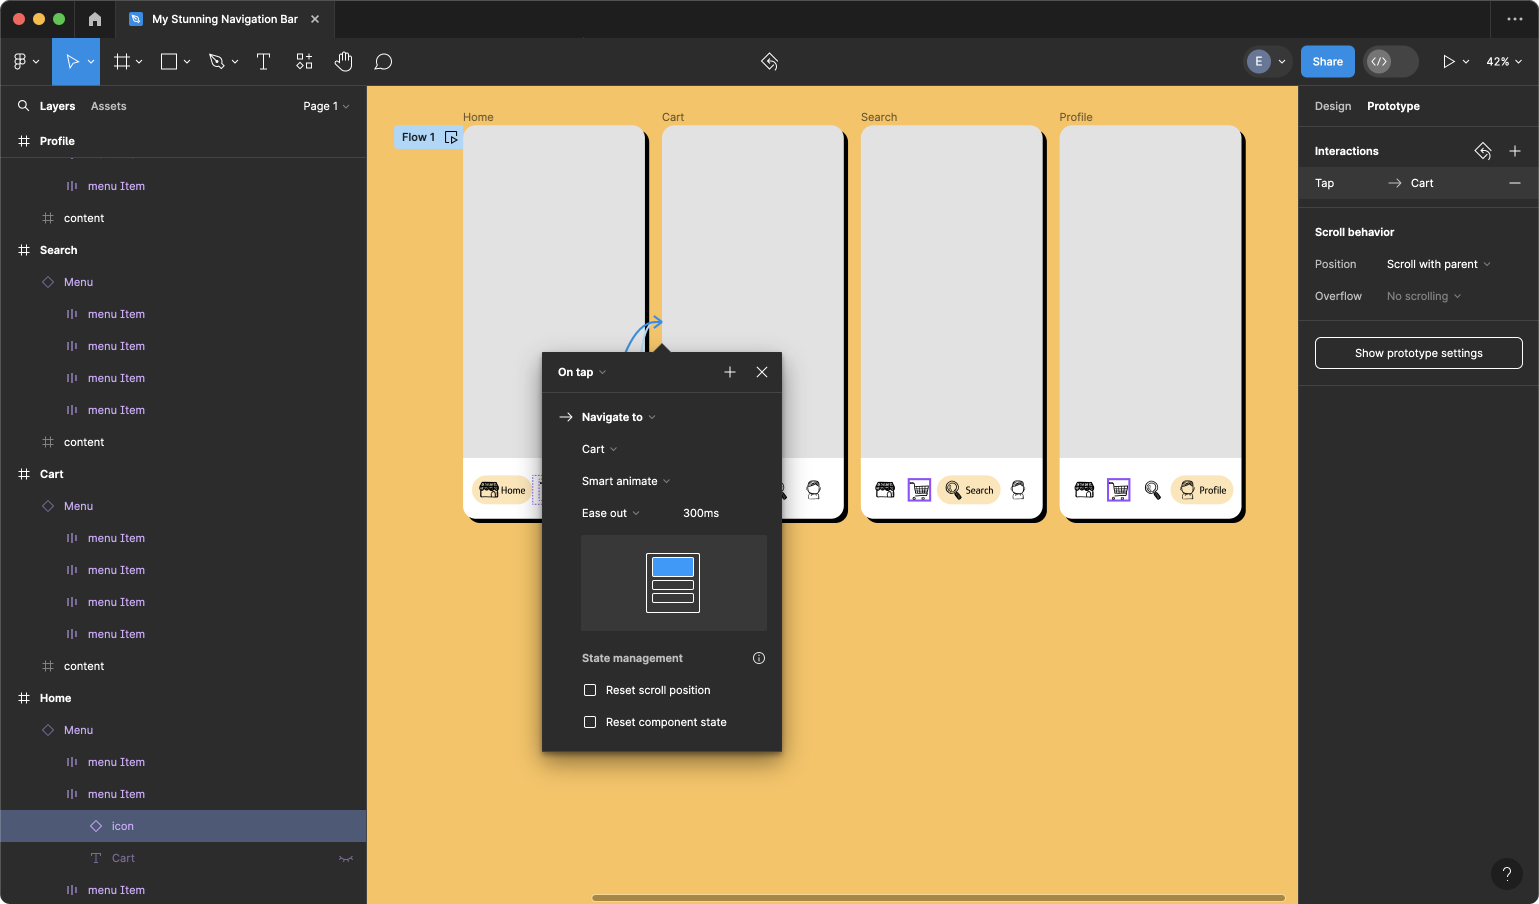
Apply the transition to each of the icons on every screen. Once you’re finished, it should create a nice network of noodles.
Final Result
Thank you for watching! If you’d like to use it in your projects, download the source file or share it, please find the link below.